Provisioning Roles › Tasks for Provisioning Roles › Create a Provisioning Role
Create a Provisioning Role
You create a provisioning role once you decide about the role requirements:
- Which Identity Management environment has users who need other accounts
- Which accounts will be associated with the role
- Who will be the members, administrators, and owners of the role
To create a provisioning role
- In the User Console, choose Roles and Tasks, Provisioning Roles, Create Provisioning Role.
For details on each tab, click the Help link on the screen.
- Complete the Profile tab. Only the Name field is required.
Note: You can specify custom attributes on the Profile tab that specify additional information about provisioning roles. You can use this additional information to facilitate role searches in environments that include a significant number of roles. For more information, see the Administration Guide.
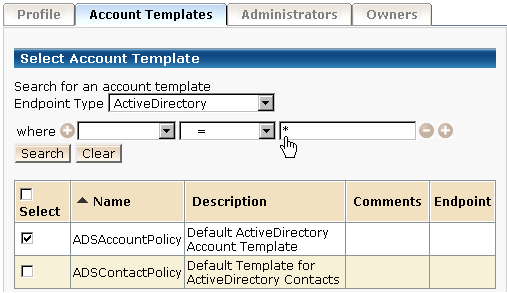
- Complete the Account Templates tab.
- Choose an Endpoint Type, such as an ActiveDirectory.
- Choose an account template. The account templates are defined in the Provisioning Manager.
The templates that you can choose are based on Endpoint Type.
- Add more account templates as needed for different endpoint types.
- Complete the Administrators tab by adding admin rules that control who manages members and administrators of this role.
- Complete the Owners tab by adding owner rules that control who can modify this role.
- Click Submit.
- To check that the role was created, choose Provisioning Roles, View Provisioning Role, then select the name of the role.
Copyright © 2009 CA.
All rights reserved.

